How Do You Prep a Car for Paint? The Ultimate DIY Guide
Learn How Do You Prep a Car for Paint like a pro with this ultimate DIY guide. From washing and sanding to priming and sealing — get a flawless finish with MagicShield products. Step-by-step tips inside!
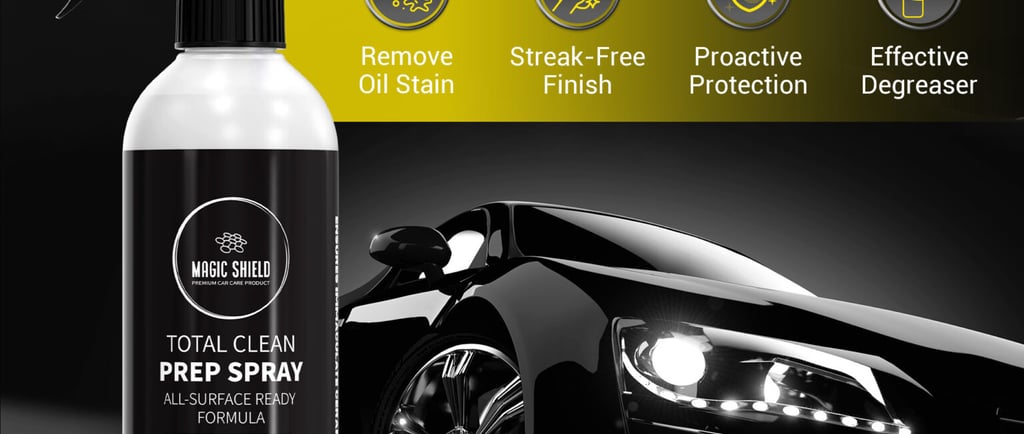
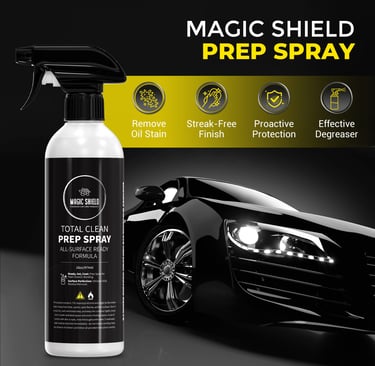
PREP SPRAY
6/11/20266 min read
If you’ve ever sat there thinking about how to prep a car for paint, well then you’re kinda ahead already of a lot of DIYers. Like, paint prep is basically the backbone of a good auto paint job. If you skip it, even the priciest paint can end up peeling, bubbling, or looking all off, usually not long after. But if you do it right, your car can honestly get that “turn heads” vibe for years.
In this ultimate guide, we’ll take you through each little part of how to prep a car for paint — starting from the first wash and getting all the way to the final surface seal , and also show you how MagicShield products from magicshield.shop can help you reach a more “shop level” result.
Why Paint Prep Is the Most Important Step
A bunch of folks get stuck on the paint shade or the final sheen they want, but seasoned auto body pros always say the same thing: the prep work is like 80% of the job. Learning how to prep a car for paint correctly means:
Paint clings better and lasts longer
Small surface problems stay covered up instead of becoming extra visible
You waste less time and money fixing things later
The final finish ends up looking neat smooth, and genuinely pro
And whether you’re repainting the whole vehicle, or just doing a small touch-up on one panel , the prep steps are pretty much the same.
Step 1: Wash the Car Thoroughly
The first real step in how to prep a car for paint is a deep, proper wash. You have to remove everything like dirt, grease, wax, and that road gunk that seems to cling forever.
What to do:
Use a solid automotive degreaser
Wash with a pH-neutral car shampoo
Focus on door jambs, edges, and the lower areas
Rinse well, then dry with a microfiber towel
Any left behind contamination is gonna mess with paint adhesion — so don’t rush this step, ok.
Step 2: Remove Old Paint or Damaged Coatings (If You Need To)
If what’s already on the panel is peeling, splitting, or looking pretty oxidized, then yeah, you’ll want to strip it , before you go putting new paint down.
Ways to do it include:
Chemical strippers — Quick, but you have to handle them carefully, like for real
Media blasting (sand ,or soda blasting) — Usually best for a full body recoat
Hand sanding — Works better on small sections, or if it’s just spot repair
Once the old layer is gone, you’ll have bare metal or primer left behind, which is basically the clean start you want for a fresh paint job.
Step 3: Sand the Surface
Sanding is kind of the soul of car paint prep. It makes a mechanical bond between the surface and the new coating, because it gives the paint something to “grab” onto.
Step 4: Fix Dents, Scratches, and Rust
Before you prime, take care of any dents or damage. This is a big deal, and beginners often skip it, then they end up regretting it later, usually in a pretty dramatic way.
For dents:
Use a body filler, or polyester filler. Put it on in thin layers, let it cure completely, then level it out with 80 to 120 grit. After that, use 220 grit so the finish is smooth enough.
For rust:
Use a rust converter, or a rust stopping primer, so you can neutralize the oxidation. If the rust is active, treat it first. Otherwise it will keep creeping under the new paint, even if it looks fine at the start.
For scratches:
If the scratches are deep, fill them first. If they’re only light surface marks, they can usually be smoothed out during the normal prep sanding process.
Step 5: Clean and Degrease Again
After all that sanding, and after any repairs, degrease the whole surface one more time. Oils from your hands alone can mess up adhesion, even if you swear you didn’t touch the “important” areas.
Use a panel wipe, or a surface prep solvent. Wipe in one direction, never back-and-forth, because you don’t want to re contaminate the finish.
Step 6: Mask Off Areas You’re Not Painting
Okay so basically, cover and protect the stuff you don’t want paint on. Glass, trim, rubber seals, lights, and any area that should stay as it is. I recommend you use quality automotive masking tape plus masking paper or plastic sheeting, because cheap stuff usually just lifts or lets paint bleed in a way that you’ll notice later.
Tips:
Press the tape edges firmly, so no paint creep happens
If you can, remove trim where possible, it usually gives a cleaner result
Cover tires, wheels, and the undercarriage too, don’t skip that part
Proper masking seriously saves you hours later, like cleanup after painting isn’t nearly as annoying.
Step 7: Apply Primer
Primer is the foundation, the foundation of the whole paint job. It seals the surface, hides tiny imperfections you didn’t even know were there, and gives the topcoat a surface it can actually bond to.
Types of primer:
Etching primer — Bonds directly to bare metal
Epoxy primer — Great for corrosion resistance
High-build primer — Fills little surface scratches and blends them out
Sealer primer — Gives you that uniform base color before topcoat
Apply primer in thin, even coats, don’t rush. Let each coat flash dry before putting on the next one. After the final coat, wet sand with 400 to 600 grit for a smooth, almost silky surface.
Step 8: Use MagicShield Surface Protection Before Painting
Before you apply your topcoat, sealing and protecting that primed surface is key especially if you’re not painting right away, or if the car ends up exposed to dust rain, humidity, or random weather stuff.
MagicShield from magicshield.shop offers professional-grade surface protection solutions made for pre-paint and post-paint use. Their products create a protective barrier that shields your prepped surface from
Moisture and humidity damage
Dust contamination
UV exposure between prep and paint sessions
Minor scratches during handling
Using a MagicShield protection layer as part of your prep process helps keep the primed surface in pristine condition—exactly how you prepped it—right up to the moment paint actually goes on.
Step 10: Inspect Under Good Lighting
Before you pick up the spray gun or a rattle can, have a look at every bit of the surface under bright light, ideally a work light kept low and at a raking angle. This helps you spot:
Low spots or high places
Unsanded scratches, like little ghosts
Contamination that won’t quit
Areas that still want more primer, not just “kind of” covered
Don’t rush here. What you notice now is what will show up later under paint , so fix it before you spray
Common Mistakes When Prepping a Car for Paint
Even pretty seasoned DIYers mess this part up. If you know it in advance it saves time and a lot of frustration:
1. Skipping the second degreasing round
After sanding, most people stop and forget to degrease again. The sanding dust mixed with skin oils ends up creating a contaminated surface
2. Using the wrong grit order
Going from 80 grit straight to 400 grit leaves deeper grooves, and those scars show through paint
3. Not handling rust before priming
Primer over active rust is basically like covering an infection with a bandage, it just won’t stay put
4. Spraying primer too thick
Thick primer tends to run and it can take forever to cure. Thin coats, always behave better
5. Painting in bad conditions
High humidity, extreme heat, or dusty air will mess up the finish. Try for ideal conditions around 65–75°F with low humidity, if you can
6. Not using a surface protector
Between prep sessions and the actual paint, an unprotected primed area can drink in moisture, catch dust , or take UV wear. Products like MagicShield from magicshield.shop handle this pretty easily
Tools You’ll Need to Prep a Car for Paint
Dual-action orbital sander
Sanding blocks, a few different ones with different grits
Sandpaper (80 up through 1500 grit range)
Automotive degreaser and a panel wipe
Body filler and spreaders
Rust converter, if needed
Automotive masking tape and paper
Spray primer (etching or epoxy)
Tack cloth
MagicShield surface protection — magicshield.shop
Also Read:
How to Polish Your Car: 7 Expert Tips for a Scratch-Free, Mirror Finish
Frequently asked questions
Q1: Do I really have to sand a car before painting?
A: Yeah, pretty much, absolutely. When you’re learning how to prep a car for paint, sanding is basically non-negotiable. It gets rid of old coatings, smooths out bumps and small defects, and gives that kind of surface texture new paint needs so it bonds properly. If you skip it, you’re setting yourself up for peeling, bubbling, or paint that ends up blotchy and fails way too soon. Start with a coarser grit first, then go toward progressively finer.
Q2: Can I paint over existing paint without stripping it?
A: Sometimes yes. But only if the existing paint is solid— like it’s well-adhered, not chalky, and there’s no rust or peeling going on. Even then you still need to sand, degrease it properly, use a sealer or adhesion promoter, and then prime before the new topcoat. If the old finish is cracking, peeling, or flaking, then stripping it down is the only dependable route, otherwise it tends to cause headaches later.
Q3: What primer is best for prepping a car for paint?
A: It depends on what you’re dealing with. For bare metal, etching primer is a strong choice because it chemically bonds to the surface. Epoxy primer usually wins for moisture control and corrosion resistance. If you’ve got minor scratches to level out, high-build primer does a great job creating a smoother foundation. For most DIY full resprays, a two-step plan— epoxy primer first, then high-build primer— tends to produce the most reliable results.
Q4: Is MagicShield only for after the paint job?
A: Not at all. MagicShield products from magicshield.shop are made to be useful at several stages, not just after everything is sprayed. They can help with protection while you’re prepping , and even between the prep step and the actual paint step. The goal is keeping your prepped surface in good shape, so the final paint finish turns out pretty much exactly how you planned it.
Help
Questions? Reach out anytime, we're here.
Links
Subscribe for latest offers
info@magicautocare.shop
© 2026. All rights reserved.
Contact Us