What Is a Clay Bar for Cars? The Complete Detailing Guide
Learn what a clay bar for cars is, how it works, and why detailers swear by it. Step-by-step guide, FAQs & expert tips from Magic Shield.
CLAY BAR CAR
6/20/202610 min read
What Is a Clay Bar for Cars?
A clay bar for cars — also known as a detailing clay bar, or an automotive clay bar, is a specially made, malleable compound that was first developed in Japan in the late 1980s and then, pretty quickly became a staple for pro auto detailers worldwide. Typically, it’s made from a mix of synthetic resins and mild abrasive particles, held in a soft, pliable base so it can be worked by hand. A car clay bar is meant to glide over lubricated paint, and in a sort of mechanical way it grabs onto contaminants that are bonded to, or already embedded within the clear coat.
Unlike a sponge, or a microfiber wash mitt which mainly only lifts loose dirt that’s sitting on the surface, a clay bar actually shears away tiny particles that have gotten physically stuck in the paint’s pores over time. The outcome is a surface that feels so smooth it’s commonly described as “glass like” , and you notice it with your fingertips as much as you do with your eyes.
At Magic Shield, our automotive clay bars are formulated for American driving conditions — from the gritty industrial corridors of the Rust Belt, to the salty coastal air in Florida and California — so each car owner can get that professional-grade paint decontamination routine without needing a shop.
How Does a Clay Bar Work?
Getting the basics of how a clay bar treatment works makes it easier to see why it works so well when normal washing isn’t enough. Car paint, even on a basically new vehicle, is not a perfectly flat surface. When you zoom in with magnification, the clear coat shows microscopic peaks, valleys, and pores. Over time, things like iron particles from brake dust or rail dust , plus industrial fallout, tree sap, bird droppings, and paint overspray, start to work their way into those tiny areas and can chemically bond to the paint surface.
When you glide a clay bar across the paint with a generous pour of clay lubricant , kind of like you mean it, two things happen at the same time (kinda in parallel) :
1) Mechanical adhesion: the clay’s sticky, flexible skin kind of grips onto embedded bits with a more solid mechanical grip than the bond that’s holding those particles to the paint in the first place.
2) Shearing action: as you run the clay bar back-and-forth with straight, overlapping passes, the trapped grime gets physically sliced free from the paint , then it ends up absorbed inside the clay matrix itself.
You can really see it happening, too. After a few passes, fold the clay bar over and you’ll spot gray or brown speckling across the surface—those are the captured contaminants sitting there , stored inside the clay. This is also why you should keep a clean clay bar stored in its original container, with a little lubricant, so it stays fresh and workable.
Pro Tip:
Try the “plastic bag test” before and after you clay. Put your hand inside a clean zip-lock bag and slowly drag it across the paint. Before claying, you’ll feel a gritty , rough texture. After a proper treatment , with a Magic Shield clay bar , the surface should feel silky smooth — like your bag-covered hand is gliding over freshly polished glass.
Why Do Cars Need a Clay Bar Treatment
Even if you wash your car every week with premium soap and a clean microfiber mitt, you’re really only getting rid of the looser contamination that’s sitting on top of the paint. What you can’t easily see, is that bonded stuff underneath, it just keeps building up year after year. And that kind of buildup, it causes actual trouble for both your paint and whatever products you try to put on it:
1) Dull, hazy look: Those embedded contaminants scatter the light instead of bouncing it back clearly, so your paint loses that depth and slick gloss, kind of like it’s slightly muted.
2) Wax and sealant problems: Protective coatings applied over contaminated paint don’t truly grab the clear coat itself. They bond to the contamination instead, so you get peeling, streaking, and a coating that fails way too early.
3) Ceramic coating underperformance: For ceramic coatings to reach the best adhesion and long-term durability, they really do need a perfectly clean and decontaminated surface. Skipping a clay bar step before ceramic application is one of the most common detailing errors, and it’s also one of the more expensive ones.
4) Faster paint breakdown: Iron fallout, industrial contamination…all of that is chemically reactive. If it stays on the paint, it can oxidize and etch into the clear coat over time. That becomes permanent damage and later only paint correction can really help, not a simple wipe down.
A proper paint decontamination routine, starting with a clay bar treatment, is honestly the most impactful maintenance move you can do between full paint corrections. It helps preserve your car’s appearance and resale value, and it keeps your future detailing results from getting sabotaged.
Benefits of Using a Clay Bar on Your Car
🔵 Helps lift hidden contaminants that a regular wash just cant reach, stuff like iron fallout, rail dust, brake residue, industrial overspray ,and tree sap
✨ Brings back that deep gloss and clear look, especially when the paint seems kinda dull even after you wash it a lot
🛡️ Makes coatings grip better — wax ,paint sealants and ceramic coatings tend to last longer when the surface is clay prepped, not just cleaned
🪟 Not only for paint either — clay barring works just as well on glass, chrome, and metal trim to cut through water spots and grime
⏱️ A smart, cost effective maintenance move — doing it regularly can stretch the time between those pricier paint correction jobs
🔬 Shows the real paint condition — once the contamination “veil” is gone, you can see what the paint actually looks and feels like, so you choose polishing and protection more accurately
🚗 Can even nudge aerodynamic efficiency — small but noticeable, the smoother finish reduces micro drag and all that
Step-by-Step Guide: How to Use a Clay Bar on Your Car
Follow this professional process, for smoother and basically spotless results from your clay bar treatment every time.
What You’ll Need
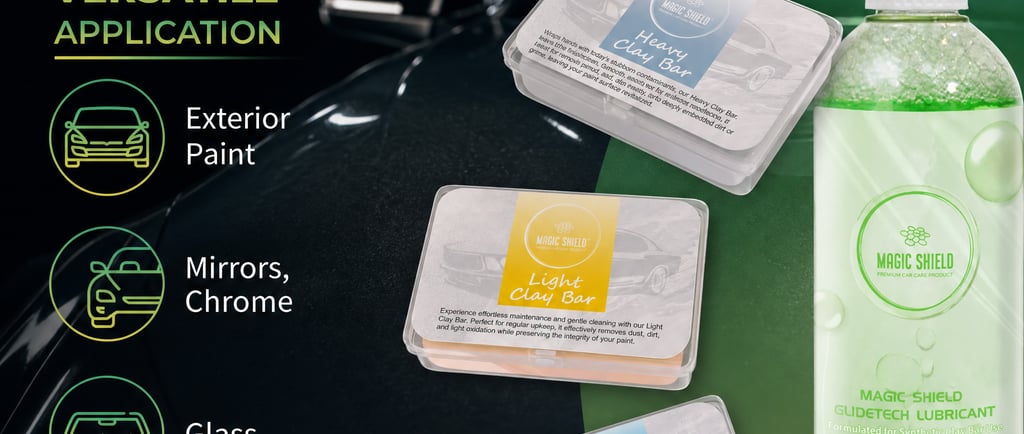
Magic Shield automotive clay bar (fine or medium grade)
Clay lubricant spray or quick detailer spray
Microfiber towels (minimum 2–3, plush, and really clean)
Car wash soap and a clean wash mitt
Access to water for a pre-wash
Wash the Car Thoroughly
Start with a real two-bucket wash, so you remove all loose dirt , and grime first. Never clay bar over a dirty surface, because those little bits get dragged across the clear coat and that’s how scratches happen. Rinse the car well , then either let it dry, or just work section by section while the paint is still slightly damp.
Work in the Shade
Move the vehicle into shade, or do it inside a garage. Direct sunlight makes the clay lubricant evaporate way too fast, and that increases the chance of marring and micro-scratches. Also keep in mind the paint should be cool enough to touch comfortably.
Prepare the Clay Bar
Tear off (or break off) a piece of clay bar roughly golf-ball size. Knead it in your hands until it feels warm , and pliable , then flatten it into a disc shape that fits over your palm. This gives you better control and helps it cover more paint each time you pass over it.
Apply Clay Lubricant Generously
Wet a 2 ft × 2 ft panel area with clay lubricant spray. The surface has to be properly coated, like fully slick, not just lightly misted. The lubricant is the go-between, the small barrier between the clay and the paint; without it, you risk leaving marks. If it starts to dry, spray more lubricant right away.
Glide the Clay Bar in straight-ish lines, kinda
Using very light pressure, like barely the weight of your hand, move the clay bar back and forth in straight overlapping passes. Don’t ever go in circles, because that can cause swirl marks. You should feel the clay “gripping” then letting go pretty quick, as it picks up the contamination. The feel becomes slicker as that area gets decontaminated, not suddenly but bit by bit.
Check and fold the Clay, often
Every few passes, take a look at the working face of the clay bar. When you spot gray or brown stuff on the surface, fold it over so you’re using a cleaner side. A new face means you’re not reintroducing grime, and yeah you don’t drag the old nastiness across the paint.
Wipe away the residue, right after
Once you finish a section, wipe off the lubricant plus any clay leftovers immediately, with a clean plush microfiber towel. Use a gentle blotting and wiping rhythm instead of yanking the towel around aggressively, like you mean it.
Work section by section, across the whole vehicle
Go systematically across the car panel by panel. A typical flow is roof → hood → trunk → doors → lower panels. Those lower panels and wheel arches usually hold the most contamination too, so they often take more passes, just in case.
Final inspection, then the bag test too
After the entire car is clay barred, do the plastic bag test on multiple panels. The finish should feel, evenly smooth. If you hit a spot that still feels rough, go back there and clay again, with a bit more lubricant, no drama.
Apply your chosen protection immediately
Now the clay barred surface is clean, decontaminated, and still totally unprotected. Put on your chosen protection right away—like a Magic Shield ceramic coating, paint sealant, or carnauba wax—as soon as possible after treatment, so you seal in those results and help shield the freshly cleaned paint.
How Often Should You Clay Bar Your Car
The correct frequency kinda depends on how you drive and where you usually park. So, as a basic guideline for American vehicle owners
Every 6 months: when you’re driving mostly in the city, and especially near railways, airports or industrial areas. Also if your car is constantly under trees, or if you get coastal salt air
Once a year: for most everyday drivers in suburban or rural places. Usually it’s smartest to do it in spring, before you put on spring wax or a sealant
Before any ceramic coating application: this is basically non-negotiable, it should not be skipped if you want the ceramic to bond properly and last longer
Before paint correction: because a clay bar helps lift contamination that might otherwise clog your polishing pads and make correction less effective
Whenever the bag test shows roughness: your paint is, in a way saying “hey, i need attention” so take that as a cue
Also note this—if you use an aggressive clay bar too often it can slowly shave down the clear coat over a bunch of years. In contrast, using a fine-grade clay bar from Magic Shield on a regular maintenance schedule tends to be way more gentle than grabbing a heavier clay bar only now and then on heavily contaminated paint
Expert Detailing Tips From the Magic Shield Team
Tip 1: Blend chemical plus mechanical decontamination
For cars with heavy iron contamination (that obvious orange or reddish speckling) , pre treat the paint using a pH-neutral iron fallout remover and let it dwell for about 5–8 minutes before rinsing. This will dissolve the iron particles first, so your clay bar doesn’t have to do the hard part. In turn you get less clay marring and your clay bar lasts longer too.
Tip 2: Try the zipper-bag trick for those precise little spots
When you’re dealing with small stubborn areas — like one section of overspray or dried tree sap — tear off a bit of clay bar and focus only on that exact zone. Keep a concentrated layer of lubricant under your hand so it slides right. Also, tuck a microfiber towel over the nearby clean paint so the clay bar edge doesn’t accidentally mark anything.
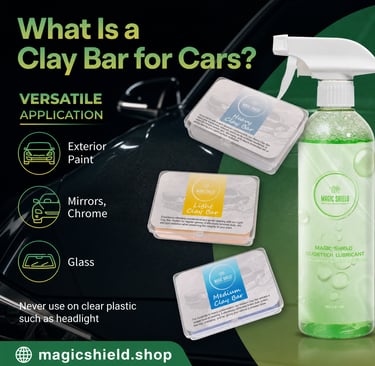
Tip 3: Glass and trim are not optional
Your windshield, rear glass, and chrome trim collect embedded contamination just like the paint does. Clay barring the glass helps water sheet better and makes your wipers work more effectively. It also leaves a clean surface ready for sealants like Magic Shield Glass Coat so it can bond well.
Tip 4: Store the clay like you mean it
Keep your clay bar in the original sealed container, and include a small amount of lubricant so it doesn’t dry out, or start hardening. When it’s stored properly, it stays usable for roughly 18–24 months. If it feels dry, or it crumbles when you try to knead it, then swap it out.
“A clay bar treatment is the step in detailing that splits people who just wash cars from people who genuinely care. No matter how strong your wax or ceramic coating is, it will struggle if the paint is contaminated. Clay first, always.”
Why choose Magic Shield Clay Bar Products?
With dozens of detailing brands out there, here’s the part where Magic Shield kinda stands out ,especially for automotive clay bar stuff:
🇺🇸 Formulated for American roads and real driving conditions — our clay bar compounds take into account the contamination patterns you actually see across the U.S. ,from Midwest industrial fallout, to that East Coast rail dust, you know the kind
🔬 Professional-grade resin compound — it uses the same synthetic resin formula that professional detailers rely on, and now it’s there for everyday use at home
🧴 Comes with premium clay lubricant — the kit includes our high-slip lubricant spray, made so it plays nicely with our clay bar compound ,not just “any” lubricant
🛡️ Safe on basically all factory paint finishes — we tested it on single-stage, base-coat/clear-coat, matte, and ceramic coated surfaces, so you don’t have to guess
📦 Full kit included — the Magic Shield Clay Bar Detailing Kit has everything you need: clay bar, lubricant spray, microfiber towels, and step-by-step guidance
⭐ Trusted by thousands of American car owners — supported by honest reviews from real detailers, no fluff
Ready to Transform Your Car's Paint?
Get the Magic Shield Clay Bar Detailing Kit — everything you need for a professional paint decontamination at home. Free shipping on orders over $35.
Shop Clay Bar Kits at Magic Shield →
Fast USA Shipping ✓ 30-Day Satisfaction Guarantee ✓ Professional Grade
Frequently asked questions
1. What does a clay bar do for a car ?
A clay bar kinda gets rid of bonded contaminants like brake dust , tree sap , industrial fallout, and road grime that a normal wash just can’t fully remove. It makes the paint feel extra smooth, and it’s basically ready for polishing or waxing after.
2. How often should I clay bar my car in the USA ?
For most people in the United States, claying every 3 to 6 months is usually the sweet spot, but it can really depend on your driving area. Like if you deal with heavy weather, lots of bugs, or industrial fallout, you might need it closer to the 3 month side.
3. Can a clay bar remove scratches ?
Not really, and this is the important part. A clay bar is for surface contaminants, not for scratches or swirl marks. If you’re dealing with actual scratches, you typically need a polish, or some kind of paint correction work instead.
4. Is it safe to use a clay bar on a new car ?
Yes, it’s safe. Even a brand new car can gather contaminants during shipping , or while it sits in storage. A clay bar lifts those impurities off and helps the paint stay smoother than before.
5. Do I need to wash my car before using a clay bar ?
Yes, absolutely. You should always wash, rinse, and dry first. Otherwise small dirt grains can act like tiny sandpaper and scratch the finish during claying, which you do not want.
6. Can a clay bar damage my car's paint ?
It won’t, if you use it right with the proper clay lubricant . But if you do it on a dirty surface, or you skip lubrication, then you can cause marring, hazing, or other rough spots.
Help
Questions? Reach out anytime, we're here.
Links
Subscribe for latest offers
info@magicautocare.shop
© 2026. All rights reserved.
Contact Us