
How Do I Polish My Car? Easy Steps for a Shiny Finish
Learn how to polish your car step by step for a smooth, glossy finish. Discover the right tools, polishing techniques, common mistakes, and paint protection tips with MagicShield.shop.
CAR POLISH
7/22/20267 min read
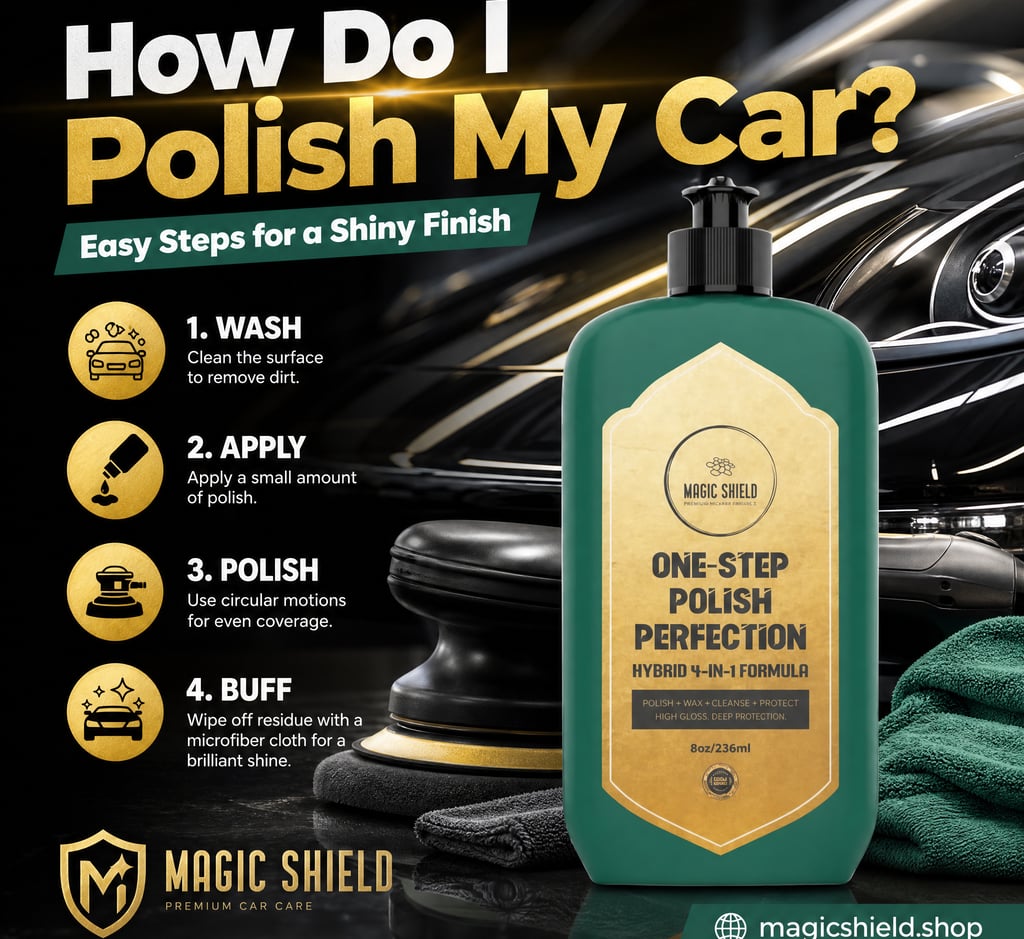
If you ever ran your hand across a just polished hood and thought, ok so, how does that mirror like shine appear, you’re not the only one. “How do I polish my car?” is one of the most common questions car owners ask after they get tired of dull paint, and those annoying swirl marks that no amount of washing seems to fix.
Good news though, polishing your car is not just for professional detailers. With the right products, a bit of patience, and a pretty clear sequence to follow, you can bring back a deep glossy look in a single weekend afternoon. This guide goes through each part of the whole thing, from washing and decontamination to hand polishing and machine polishing, so you’re not only doing steps but also understanding why they count. Like, what’s happening under the hood, or rather on the clear coat.
Why polishing your car matters
Over time, that clear coat layer just takes constant hits. Sun exposure road muck, bird droppings, tree sap, plus even those automatic car washes leave behind micro scratches, swirl patterns, and oxidation. You might not notice it from far away, but under strong sunlight it starts showing up as a hazy, tired looking finish.
Polishing is basically leveling out the damaged clear coat surface, it removes a tiny top layer of those imperfections so light can reflect more evenly again across the entire panel. That’s what gives the glossy “wet look” people usually associate with a well kept vehicle. Then you wax, or you apply a sealant afterward, but that protection step is different. It helps guard against future damage, still it cannot correct paint defects the way polishing can.
Step 1, Start With a real thorough rinse (and wash, ish)
Every decent car polishing process starts with a surface that’s actually clean. If you polish a dirty car, it’s kind of the fastest way to invite fresh scratches in there, because leftover grit gets moved around, dragged across the paint by whatever applicator pad you’re using.
Do the two bucket thing: one bucket with soapy water, and one with plain rinse water, so you don’t re-plant dirt onto your wash mitt.
Grab a pH-neutral car shampoo, not dish soap, since dish soap can chew through existing wax or sealant in a weird uneven way.
Wash from top to bottom too, because the lower panels usually collect more road grime.
Then dry with a clean microfiber towel, or use a blower, so you don’t end up with annoying water spots.
Just to be clear, this step won’t make the paint sparkle the way a real polish can , but it does build the whole base for everything after it.
Step 2, Decontaminate the paint properly
This is the part that a lot of beginners kind of “forget” or skip , and that’s usually why the final polish result doesn’t look right. Washing will remove loose road dust, sure, but it won’t take care of bonded stuff like tar spots, industrial fallout, or the embedded brake dust that lives on top of the clear coat.
What to do for decontamination
After washing, run your hand over the paint using a plastic sandwich bag over your fingers. If it feels gritty, not like glass smooth, then contaminants are still hanging around.
Use a dedicated iron remover spray to dissolve those embedded metal particles. They often appear as little orange or purple specks as the product reacts.
Follow with a clay bar or a clay mitt, glide it across the panel with lubrication, and it lifts the remaining bonded debris.
If you skip decontamination, your polishing pad won’t glide over a level plane. It rides over little bumps instead, so the polish can correct the surface unevenly, and that’s when people start thinking the polishing process “didn’t work”, when it actually just didn’t have the right prep.
Step 3 Choose the Right Polish for Your Paint
Not all polishes are really made equal, and this is where a lot of people kinda get stuck. The products can be anywhere from a very mild finishing polish all the way to heavier cutting compounds, and using the wrong one can either not budge the defects at all or, worse, take off too much clear coat, like way faster than you expected.
General guide to polish types:
Light polish / finishing polish – Best for small swirl marks and light oxidation. Works great on cars where the paint is mostly healthy, it just needs a bit of a refresh.
Medium cutting polish – Tackles moderate scratches, water spots, and the more obvious swirling.
Heavy compound – Usually saved for deeper scratches or serious oxidation, and it’s typically followed by a finishing polish so the gloss comes back and looks even.
If you’re not sure which category your car is in, start with the mildest option and move up only when it’s actually needed. This is a safer path for your clear coat, plus you get way more control over the final result. And yeah, a good car polish for a shiny finish should be matched with the right pad, because pad aggressiveness matters almost as much as the polish itself.
Step 4 Hand Polishing vs Machine Polishing
This is pretty much the big “ fork in the road “ when people ask how to polish a car the first time.
Hand Polishing
Hand polishing is easy enough, it does not need special gear beyond a foam applicator pad and microfiber towels, and it can be surprisingly effective for light issues and general shine improvement. It’s slower, and it asks for more physical effort, too. It won’t erase deeper scratches, though. For routine upkeep polishing, it gets the job done well.
Basic hand polishing steps:
Apply a small amount of polish to an applicator pad.
Work it into the paint in overlapping circular motions, covering a two-foot section at a time.
Allow it to haze slightly, then buff off with a clean microfiber towel.
Machine Polishing
A dual-action (DA) polisher is the tool of choice for most enthusiasts and professionals because it's forgiving on paint while still delivering consistent correction. Rotary polishers offer more cutting power but carry a higher risk of burning through paint if used incorrectly, so they're generally better left to experienced hands.
Basic machine polishing steps:
Prime the pad with polish and spread it evenly across the panel at low speed.
Work the polisher in slow, overlapping passes, increasing speed gradually.
Keep the pad flat against the surface and avoid tilting the edge into the paint.
Wipe away residue with a clean microfiber towel and inspect under good lighting.
Machine polishing is generally the better choice for full car paint correction, since it applies more even pressure and covers larger areas with consistent results.
Step 5: Getting Rid of Small Light Imperfections
After you finish your main pass, take a second look under really bright, direct light. Ideally sunlight, or an inspection lamp set up for this. Regular fluorescent garage lighting can mask swirl marks and then they pop out later once you’re outside.
If you still see light scratches or a bit of haze hanging around then, go back over that section with the same polish first, before you decide to go stronger or more aggressive.
For those isolated deeper scratches, a tiny bit of localized compounding might be necessary, then follow it with a finishing polish so the repaired patch blends back in. Water spots and light oxidation usually do better with a second, focused pass. Not more pressure, not just brute force.
Honestly, patience here beats force every time. A few gentle passes, will typically beat one harsher pass, and the final result looks more even, less “spotty”.
Common Mistakes to Avoid
Even if you’re trying to do everything right, a couple of recurring slip ups tend to show up with first-time polishers:
Polishing in direct sunlight, or on a panel that’s still hot. This makes the product flash off too quickly, then it smears, and correction becomes uneven.
Using too much product. More polish doesn’t equal more correction, it often turns into a greasy mess, and it wastes product fast.
Skipping decontamination. Like earlier, this can cause inconsistent results, and it also increases the chance of adding new marks while you polish.
Pushing too hard with a machine polisher. Let the pad and the product do the work instead of pressing down.
Forgetting to clean or rotate pads. If the pad has debris, it basically reintroduces the same dust and particles you were trying to remove in the first place.
Skipping protection afterward. Paint that’s been polished but not protected, is more vulnerable to fresh contamination, and also to UV damage.
Step 6: Protect the Paint After Polishing
Polishing removes a microscopic layer of clear coat to reveal a smoother, glossier surface, but that freshly polished paint is also more exposed until it's protected. This is where a wax, sealant, or ceramic coating comes in.
At MagicShield.shop, this final step is treated as just as important as the polishing itself. Applying a quality paint protection product locks in the shine you just worked for and adds a barrier against UV rays, water spots, and everyday grime. Ceramic coatings tend to last longest and offer strong hydrophobic properties, while traditional waxes are easier to apply and reapply more frequently. Either way, protecting the paint right after polishing is what keeps that finish looking fresh for months rather than weeks.
How to Make Car Paint Shine and Keep It That Way
Getting a shiny finish is one thing, maintaining it is another. A few habits go a long way:
Wash your car every one to two weeks using proper technique to avoid reintroducing swirl marks.
Avoid automated car washes with abrasive brushes when possible.
Reapply wax or top up a ceramic coating according to the product's recommended schedule.
Park in shade when you can to reduce UV exposure and oxidation over time.
Address contaminants like tree sap or bird droppings promptly rather than letting them sit.
Consistent, gentle maintenance between full polishing sessions is what separates a car that looks good for a week from one that stays glossy year-round.
Also Read:
Black Diamond Coating for Cars | Magic Shield
Frequently asked questions
How often should I polish my car?
For most daily driven cars, polishing once a year , or maybe twice, is usually good enough, plus normal washing and a bit of waxing in between. If the car is outside a lot, with harsh sun, or it gets hit by heavy road grime, then it might need more frequent attention, kind of like a little maintenance rhythm.
Can I polish my car by hand and still get good results?
yes. Hand polishing can still do a lot, especially for small imperfections and just general shine boosting, though it tends to take more time and effort than machine polishing , and it usually won’t fix deeper scratches in any meaningful way.
Is polishing the same as waxing?
Not exactly. Polishing levels and refines the paint surface, it helps reduce scratches, and it addresses oxidation. Waxing or sealing is more about adding a protective coat on top. Different steps , different jobs.
Will polishing remove deep scratches?
Light to moderate scratches often improve a lot with polishing, but deep ones that you can feel with a fingernail usually need touch up paint or actual professional paint correction, because polishing can’t always “erase” that much damage.
Do I need a machine polisher, or is hand polishing enough?
It depends on what you’re trying to fix. If your paint is already in pretty decent shape, hand polishing is often plenty. But if you’re seeing stronger swirl marks , or you want real paint correction, a dual action machine polisher can give more even results with less physical effort.
Help
Questions? Reach out anytime, we're here.
Links
Subscribe for latest offers
info@magicautocare.shop
© 2026. All rights reserved.
Contact Us